Building cabinets from scratch is hard but rewarding. I was gifted the quartersawn oak face frame material by my friend Adam - who passed away recently. So these cabinets are going to be all the more special....(& I'm trying really hard not to screw them up)
List of stuff I did for the first time on this cabinet project: built cabinets of any kind, used pocket screws (kreg jig), used shellac, used a biscuit jointer, used vinegar & steel finish, assembled cabinet drawers, installed recessed hinges, etc, etc.
I ordered the drawer boxes from Barker (link: http://www.barkerdoor.com/Baltic-Plywood-Dovetail-Drawer-Boxes-p/drawerbox-baltic-dovetail.htm ) These were perfect and you can order them in 1/16" increments. I ordered them unassembled and unfinished. They went right together with a rubber mallet and bit of glue. The boxes do need some sanding and then I finished mine with "emmet's good stuff" which was leftover from finishing the raw edges on my butcherblock counter. Lots of other products would work just as well.
In case you're wondering about my "shop" - for most of the work, it has been this bench I built in my garage out of 2x4s and plywood.
You can see that the floor is now in. It's a sheet marmoleum product. Abbey flooring in Missoula installed a 3/8" subfloor and the marmoleum for less than $800 total. Then, I wrapped the curved booth with 1/4" wacky wood from intermountain wood products. I'll come back later and finish the face with a quartersawn oak veneer to match the cabinets.
Here you can see the hard rock maple butcher block, 2 burner stove, stainless sink, faucet, faceframe, and drawer boxes installed.
(Another view)
Looking towards the rear. You can also see the electrical system tie-in work starting to happen.

I chose to go with recessed, soft close hinges. Honestly might not be the best choice in the long run. The hinge mount is super solid in the door but there is only one screw holding each hinge to the face frame and even those are slotted mounts that can move. After having mounted them, I expect them to fail at some point and am already thinking about what I'll do when they do fail (no good ideas yet)

Here I am mounting the drawer faces to the boxes. If it isn't clear from my blog, I highly recommend this order of process; 1) Mill all of the face frame material to the exact same thickness 2) The doors and drawer material needs to be all the same thickness too. I did everything at once and made it all 3/4" thick. 3) build the face frame with a kreg jig and pocket screws with glue 4) build the doors and drawer faces 5) Install a cabinet floor 6) build the cabinet ends and dividers - I mounted a sheet of 1/2" plywood to the aluminum wall so that I could put screws anywhere and not worry about hitting wires, plus it gave me a nice and square top lip for the counter that I squared the end panels and dividers to. 6) Mount the face frame and square everything up. 7) Cut the countertop to length and install. 8) Once mounted, cut the holes in the countertop for sink, stove, etc. 9) Mount the hinges to the face frame and either run a piece of material (wood) to the back so that the hinge is supported or use a hanging bracket that is normally optional with the hinges. 10) Assemble and install drawer boxes flush with the face frame. 11) install drawer faces, recessed hinges and doors 12) I haven't done it yet but looking forward to installing knobs/pulls/handles next.


Here you can see the first two drawer faces and the first door going in. so far, so good...
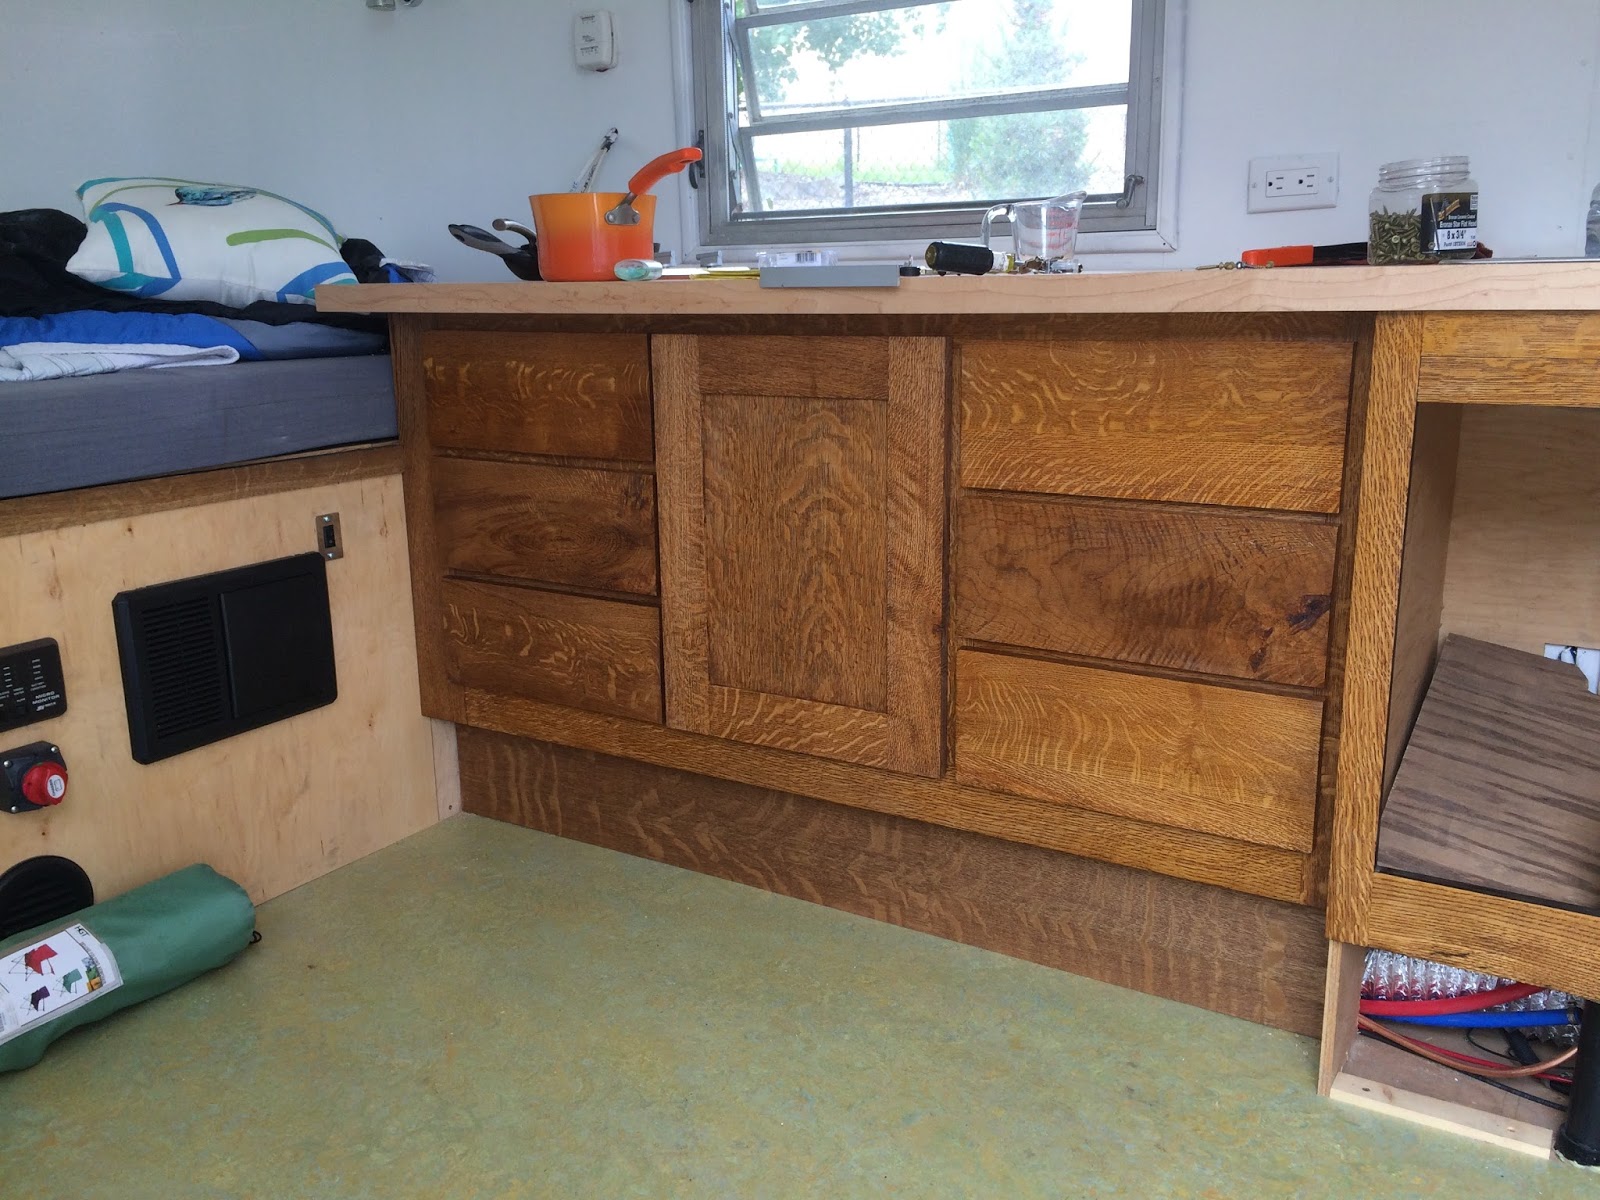
Here's the final product!!! (I'm really happy with how this has turned out so far. Still needs pulls and the new (atwood xt) furnace isn't working, so I'm waiting to install one that does before finishing the under sink cab)


 I chose to go with recessed, soft close hinges. Honestly might not be the best choice in the long run. The hinge mount is super solid in the door but there is only one screw holding each hinge to the face frame and even those are slotted mounts that can move. After having mounted them, I expect them to fail at some point and am already thinking about what I'll do when they do fail (no good ideas yet)
 Here I am mounting the drawer faces to the boxes. If it isn't clear from my blog, I highly recommend this order of process; 1) Mill all of the face frame material to the exact same thickness 2) The doors and drawer material needs to be all the same thickness too. I did everything at once and made it all 3/4" thick. 3) build the face frame with a kreg jig and pocket screws with glue 4) build the doors and drawer faces 5) Install a cabinet floor 6) build the cabinet ends and dividers - I mounted a sheet of 1/2" plywood to the aluminum wall so that I could put screws anywhere and not worry about hitting wires, plus it gave me a nice and square top lip for the counter that I squared the end panels and dividers to. 6) Mount the face frame and square everything up. 7) Cut the countertop to length and install. 8) Once mounted, cut the holes in the countertop for sink, stove, etc. 9) Mount the hinges to the face frame and either run a piece of material (wood) to the back so that the hinge is supported or use a hanging bracket that is normally optional with the hinges. 10) Assemble and install drawer boxes flush with the face frame. 11) install drawer faces, recessed hinges and doors 12) I haven't done it yet but looking forward to installing knobs/pulls/handles next.

 Here you can see the first two drawer faces and the first door going in. so far, so good...
 Here you can see the basic shape outlined in masking tape.
 This shows the beginning of the frame and the black metal table legs. This is a cool design that swings down to sleeper height. It also is mobile and can go outside.
 Working on where to put the seams in the plywood & cushions. I want them to line up so its easier to access under seat storage. Thinking I'll permanently mount seat plywood in the corners and then leave the three other sections as access.
  In this section, I'm thinking one big piece of plywood/cushion. Not planning to put in a hinge, just a small lip to keep plywood in place and then velcro the cushion.
 This was one of the last bits of insulation. You can see pest damage & tunnels.
 Reflectix insulation going in.
 Wiring from under the chassis. Brown wires are for the brakes. 120v black (with plugs) and red wires are for the 2-way holding tank heaters.
 In this picture, you can see that I've removed the sawhorses and have begun lowering the shell back onto the chassis/floor.
 As with lifting it, I use a bottle jack to support half the shell, put some short legs on the wood frame and lower it down to the new level.
 The 'C' channel and brackets attaching it to the studs were in bad shape. In this picture, I'm fabricating new L brackets to make the attachment. Easier to drill holes in the large material before I cut it.
  Cutting the new brackets.
 Piling up the new brackets.


 Here you can see the cable valterra valves. I welded a piece of angle iron to mount the handles and will figure out how to make that look pretty later.
 Put the trailer back under the shell! Oh hells yeah. Feels great, can't imagine how good it'll be to get it reconnected - much less useable!
 Steel work is done! 80% new steel. New ribs, hitch coupler, step, tank supports, etc. Everything looks great and is mostly square:) I say mostly because the galvanized ribs in on either side of the wheel wells were a little tweaked and I got them close but not perfect. One turned out being 3/8" bigger than the other. Everything else is surprisingly perfect. Like within 1/16" end to end. BIG SHOUT to my friend Adam Pfiffner (Bloxx & Pfiffner Design Build) who is renting me shop space & helping me get the hard parts right. Like installing the axles - his design, layout, & welds are perfect. He's the one that helped me with hard and important stuff like axles, hitch, steel design, etc.
  Now starting to install the wood floor. I went with 5/8" marine plywood (AB) and then coated both sides and edges with smith's two part epoxy. Very happy with the smiths product. Using two kinds of fasteners from vintage trailer supply. one is a bolt through and the other requires a drill & tap.
 Floor is all cut and almost done with the smiths epoxy coating. Must admit, I'm nervous about the shell fitting my curved corners. The front should be very close because I was able to save sections of the old floor to use as templates. The rear floor was so rotten that I had to guess.
  Finalizing my floorplan. This is the fun part! Originally, I was going to work around the existing floorplan and infrastructure to make it work for our family of 4. Going the full monty means I have total flexibility to do whatever I want - & that's pretty cool. Here's a simple sketch of my design.
 Laying out the floorplan with masking tape. This was awesome to see it lifesize for the first time.

