Building cabinets from scratch is hard but rewarding. I was gifted the quartersawn oak face frame material by my friend Adam - who passed away recently. So these cabinets are going to be all the more special....(& I'm trying really hard not to screw them up)
List of stuff I did for the first time on this cabinet project: built cabinets of any kind, used pocket screws (kreg jig), used shellac, used a biscuit jointer, used vinegar & steel finish, assembled cabinet drawers, installed recessed hinges, etc, etc.
I ordered the drawer boxes from Barker (link: http://www.barkerdoor.com/Baltic-Plywood-Dovetail-Drawer-Boxes-p/drawerbox-baltic-dovetail.htm ) These were perfect and you can order them in 1/16" increments. I ordered them unassembled and unfinished. They went right together with a rubber mallet and bit of glue. The boxes do need some sanding and then I finished mine with "emmet's good stuff" which was leftover from finishing the raw edges on my butcherblock counter. Lots of other products would work just as well.
In case you're wondering about my "shop" - for most of the work, it has been this bench I built in my garage out of 2x4s and plywood.
You can see that the floor is now in. It's a sheet marmoleum product. Abbey flooring in Missoula installed a 3/8" subfloor and the marmoleum for less than $800 total. Then, I wrapped the curved booth with 1/4" wacky wood from intermountain wood products. I'll come back later and finish the face with a quartersawn oak veneer to match the cabinets.
Here you can see the hard rock maple butcher block, 2 burner stove, stainless sink, faucet, faceframe, and drawer boxes installed.
(Another view)
Looking towards the rear. You can also see the electrical system tie-in work starting to happen.

I chose to go with recessed, soft close hinges. Honestly might not be the best choice in the long run. The hinge mount is super solid in the door but there is only one screw holding each hinge to the face frame and even those are slotted mounts that can move. After having mounted them, I expect them to fail at some point and am already thinking about what I'll do when they do fail (no good ideas yet)

Here I am mounting the drawer faces to the boxes. If it isn't clear from my blog, I highly recommend this order of process; 1) Mill all of the face frame material to the exact same thickness 2) The doors and drawer material needs to be all the same thickness too. I did everything at once and made it all 3/4" thick. 3) build the face frame with a kreg jig and pocket screws with glue 4) build the doors and drawer faces 5) Install a cabinet floor 6) build the cabinet ends and dividers - I mounted a sheet of 1/2" plywood to the aluminum wall so that I could put screws anywhere and not worry about hitting wires, plus it gave me a nice and square top lip for the counter that I squared the end panels and dividers to. 6) Mount the face frame and square everything up. 7) Cut the countertop to length and install. 8) Once mounted, cut the holes in the countertop for sink, stove, etc. 9) Mount the hinges to the face frame and either run a piece of material (wood) to the back so that the hinge is supported or use a hanging bracket that is normally optional with the hinges. 10) Assemble and install drawer boxes flush with the face frame. 11) install drawer faces, recessed hinges and doors 12) I haven't done it yet but looking forward to installing knobs/pulls/handles next.


Here you can see the first two drawer faces and the first door going in. so far, so good...
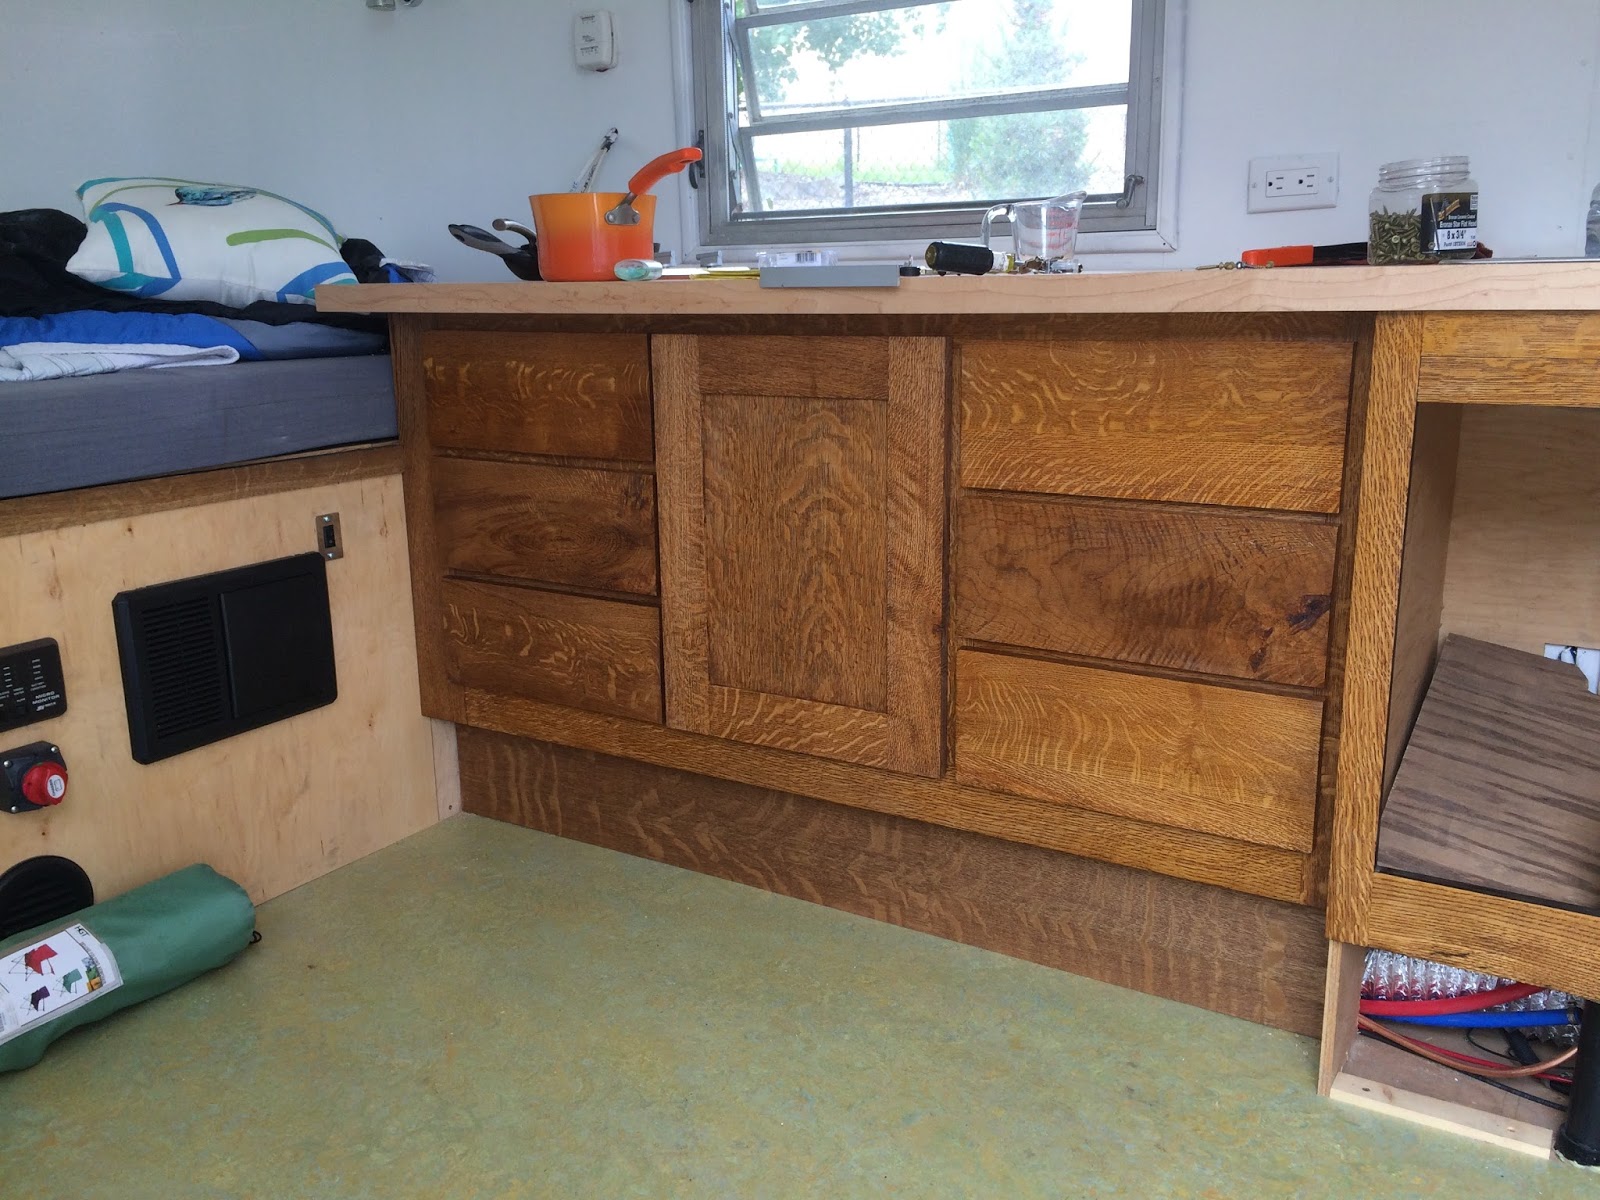
Here's the final product!!! (I'm really happy with how this has turned out so far. Still needs pulls and the new (atwood xt) furnace isn't working, so I'm waiting to install one that does before finishing the under sink cab)


 I chose to go with recessed, soft close hinges. Honestly might not be the best choice in the long run. The hinge mount is super solid in the door but there is only one screw holding each hinge to the face frame and even those are slotted mounts that can move. After having mounted them, I expect them to fail at some point and am already thinking about what I'll do when they do fail (no good ideas yet)
 Here I am mounting the drawer faces to the boxes. If it isn't clear from my blog, I highly recommend this order of process; 1) Mill all of the face frame material to the exact same thickness 2) The doors and drawer material needs to be all the same thickness too. I did everything at once and made it all 3/4" thick. 3) build the face frame with a kreg jig and pocket screws with glue 4) build the doors and drawer faces 5) Install a cabinet floor 6) build the cabinet ends and dividers - I mounted a sheet of 1/2" plywood to the aluminum wall so that I could put screws anywhere and not worry about hitting wires, plus it gave me a nice and square top lip for the counter that I squared the end panels and dividers to. 6) Mount the face frame and square everything up. 7) Cut the countertop to length and install. 8) Once mounted, cut the holes in the countertop for sink, stove, etc. 9) Mount the hinges to the face frame and either run a piece of material (wood) to the back so that the hinge is supported or use a hanging bracket that is normally optional with the hinges. 10) Assemble and install drawer boxes flush with the face frame. 11) install drawer faces, recessed hinges and doors 12) I haven't done it yet but looking forward to installing knobs/pulls/handles next.

 Here you can see the first two drawer faces and the first door going in. so far, so good...

 This picture shows one of the big problems I had to solve. This corner had a fiberglass shower stall that broke when I removed it. I had no idea how hard it would be to cover this area with aluminum. The white triangle piece is fiberglass cut from the shower and all of the silver strips are a trial and error effort that finally paid off with the help of a fishing buddy.
  Here is the bed with the plywood cover. I used high grade 1/2" maple from Lowes. Its about $42 per sheet. I could probably get away with a lower grade 3/8" product but I'm not taking any shortcuts. I cut the back corners first. Process is to get a piece that is oversized and about the right shape, then I made a scribe (1/2" x 1/2" x 18" square & pointed stick with a hole drilled in it for a pencil to poke through). I drilled several pencil holes in my scribe tool and basically just cut and re-cut until I could match the irregular shape of the walls. For me, being patient and taking my time paid off & every joint is within 1/8" of perfect.
 Back to the outside to add a gravity water fill spout. This barely fit under the gold trim, under the top of the bed on the inside, and still had enough fall to the top of my 60 gallon fresh water tank under the bed. Guess I can't always be unlucky:)
 Here's another first for me. Decided to go with curved radius corners on my booth. You can see in the back that I cut a big half circle out of 3/4" plywood and then cut the circle in half to make two 1/4 circles. Then I put lots of studs for surface area to attach the skin material later. I'm using HD screws for everything.
 Hard to explain how great it was to paint the inside. Not the first coat though. I ordered razzou zolotone textured paint and bought a special sprayer to apply it, and could not have been more disappointed. One application my ass. Anyway, it was a disaster. I tried putting it on thick enough so that it would cover the primer and then it dripped and I had to wipe it off... My recommendation is to pass on zolotone. It did help to soften some texture changes but wasn't worth the $200 - especially since I had to paint two layers of primer and 4 layers of latex over it anyway. Primer and good latex is hard to beat.
 This shot shows paint in the other direction and the 60 gallon fresh water tank. Hope the framing is strong enough to hold the 500lbs of water sloshing around...? I'll come back and make it stronger later.
 Installed these tall panels to go define fridge/convection oven space and also added a back and end to kitchen cabinets.
 Here you can see the table and beginnings of my radius booth. The table has a latch that swings the top down to bed height and also allows it to go outside for use. My buddy has a table like this in his RPod and I love it.
 It's been tricky to attach the shell over the bellypan but I got it all figured out and sent rivets through the top shell, belly pan, 'C' channel, and belly pan. The belly pan aluminum is crimped over the channel, so the rivets go through it twice.
  Here's where old meets new. I used the old pan in the corners - because I didn't think I could figure out how to shape the aluminum and they are still in fair condition.

 This is "foam it green" brand sprayfoam. It's the 202 kit of structural, closed cell product. I put it on thick, so it only covered about 80 sqft. Price with shipping was about $250, so that's more than $3/sqft. Not as expensive as some options but certainly more than others. Overall, I'd say that I'm moderately pleased. It is fairly rigid and has decent adhesion but wasn't very difficult to remove in areas of overspray.
 In this picture, you can see that I've removed the sawhorses and have begun lowering the shell back onto the chassis/floor.
 As with lifting it, I use a bottle jack to support half the shell, put some short legs on the wood frame and lower it down to the new level.
 The 'C' channel and brackets attaching it to the studs were in bad shape. In this picture, I'm fabricating new L brackets to make the attachment. Easier to drill holes in the large material before I cut it.
  Cutting the new brackets.
 Piling up the new brackets.


