 |
| Reattaching ceiling panel |
I've done most of this work by myself, and that makes for some creative solutions to act as extra hands. In this case, I built a wood frame just below the ceiling so that I could support the center ceiling aluminum without having it fall and have its own weight cause a crease. It worked great.
 |
| Bed frame |
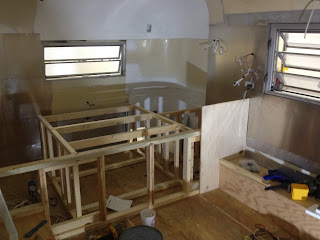
Above is a picture of the bed frame. Trying to accomplish a bunch of objectives here. First, this trailer has a tailgate with rear storage, so the bed frame had to be above that...giving it a height of 24". I also wanted an oversized water tank because I'm not worried about weight (tow vehicle has a Hemi) and it just seem luxurious. So, the center compartment is huge to accommodate a 60 gallon fresh water tank. Other concerns were that this is built over my two waste water tanks, so I had to be careful where and how to attach this frame to the 5/8" floor. The sheet of plywood you see on the right side looks out of place in this pic, but it's the end panel for my kitchen cabinet.

This picture shows one of the big problems I had to solve. This corner had a fiberglass shower stall that broke when I removed it. I had no idea how hard it would be to cover this area with aluminum. The white triangle piece is fiberglass cut from the shower and all of the silver strips are a trial and error effort that finally paid off with the help of a fishing buddy.
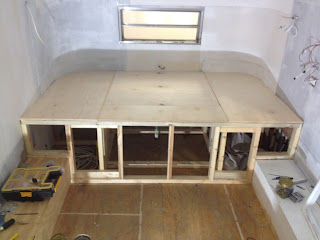
Here is the bed with the plywood cover. I used high grade 1/2" maple from Lowes. Its about $42 per sheet. I could probably get away with a lower grade 3/8" product but I'm not taking any shortcuts. I cut the back corners first. Process is to get a piece that is oversized and about the right shape, then I made a scribe (1/2" x 1/2" x 18" square & pointed stick with a hole drilled in it for a pencil to poke through). I drilled several pencil holes in my scribe tool and basically just cut and re-cut until I could match the irregular shape of the walls. For me, being patient and taking my time paid off & every joint is within 1/8" of perfect.
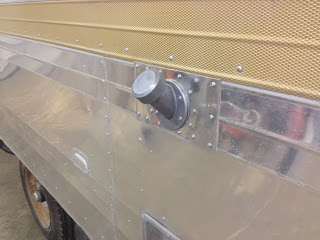
Back to the outside to add a gravity water fill spout. This barely fit under the gold trim, under the top of the bed on the inside, and still had enough fall to the top of my 60 gallon fresh water tank under the bed. Guess I can't always be unlucky:)
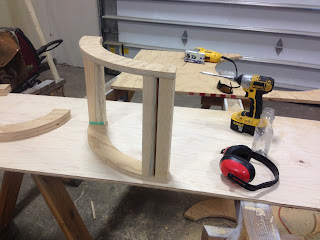
Here's another first for me. Decided to go with curved radius corners on my booth. You can see in the back that I cut a big half circle out of 3/4" plywood and then cut the circle in half to make two 1/4 circles. Then I put lots of studs for surface area to attach the skin material later. I'm using HD screws for everything.
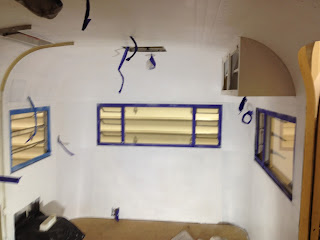
Hard to explain how great it was to paint the inside. Not the first coat though. I ordered razzou zolotone textured paint and bought a special sprayer to apply it, and could not have been more disappointed. One application my ass. Anyway, it was a disaster. I tried putting it on thick enough so that it would cover the primer and then it dripped and I had to wipe it off... My recommendation is to pass on zolotone. It did help to soften some texture changes but wasn't worth the $200 - especially since I had to paint two layers of primer and 4 layers of latex over it anyway. Primer and good latex is hard to beat.
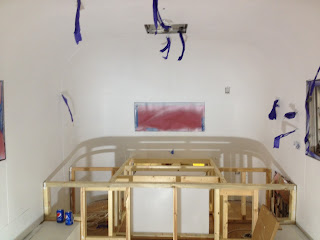
This shot shows paint in the other direction and the 60 gallon fresh water tank. Hope the framing is strong enough to hold the 500lbs of water sloshing around...? I'll come back and make it stronger later.
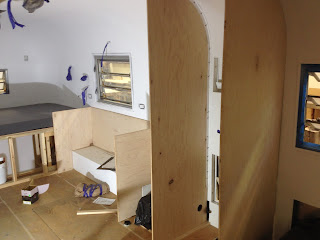
Installed these tall panels to go define fridge/convection oven space and also added a back and end to kitchen cabinets.
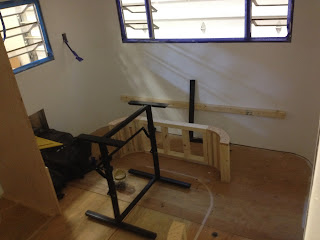
Here you can see the table and beginnings of my radius booth. The table has a latch that swings the top down to bed height and also allows it to go outside for use. My buddy has a table like this in his RPod and I love it.


 This picture shows one of the big problems I had to solve. This corner had a fiberglass shower stall that broke when I removed it. I had no idea how hard it would be to cover this area with aluminum. The white triangle piece is fiberglass cut from the shower and all of the silver strips are a trial and error effort that finally paid off with the help of a fishing buddy.
  Here is the bed with the plywood cover. I used high grade 1/2" maple from Lowes. Its about $42 per sheet. I could probably get away with a lower grade 3/8" product but I'm not taking any shortcuts. I cut the back corners first. Process is to get a piece that is oversized and about the right shape, then I made a scribe (1/2" x 1/2" x 18" square & pointed stick with a hole drilled in it for a pencil to poke through). I drilled several pencil holes in my scribe tool and basically just cut and re-cut until I could match the irregular shape of the walls. For me, being patient and taking my time paid off & every joint is within 1/8" of perfect.
 Back to the outside to add a gravity water fill spout. This barely fit under the gold trim, under the top of the bed on the inside, and still had enough fall to the top of my 60 gallon fresh water tank under the bed. Guess I can't always be unlucky:)
 Here's another first for me. Decided to go with curved radius corners on my booth. You can see in the back that I cut a big half circle out of 3/4" plywood and then cut the circle in half to make two 1/4 circles. Then I put lots of studs for surface area to attach the skin material later. I'm using HD screws for everything.
 Hard to explain how great it was to paint the inside. Not the first coat though. I ordered razzou zolotone textured paint and bought a special sprayer to apply it, and could not have been more disappointed. One application my ass. Anyway, it was a disaster. I tried putting it on thick enough so that it would cover the primer and then it dripped and I had to wipe it off... My recommendation is to pass on zolotone. It did help to soften some texture changes but wasn't worth the $200 - especially since I had to paint two layers of primer and 4 layers of latex over it anyway. Primer and good latex is hard to beat.
 This shot shows paint in the other direction and the 60 gallon fresh water tank. Hope the framing is strong enough to hold the 500lbs of water sloshing around...? I'll come back and make it stronger later.
 Installed these tall panels to go define fridge/convection oven space and also added a back and end to kitchen cabinets.
 Here you can see the table and beginnings of my radius booth. The table has a latch that swings the top down to bed height and also allows it to go outside for use. My buddy has a table like this in his RPod and I love it.


