Building cabinets from scratch is hard but rewarding. I was gifted the quartersawn oak face frame material by my friend Adam - who passed away recently. So these cabinets are going to be all the more special....(& I'm trying really hard not to screw them up)


 I chose to go with recessed, soft close hinges. Honestly might not be the best choice in the long run. The hinge mount is super solid in the door but there is only one screw holding each hinge to the face frame and even those are slotted mounts that can move. After having mounted them, I expect them to fail at some point and am already thinking about what I'll do when they do fail (no good ideas yet)
 Here I am mounting the drawer faces to the boxes. If it isn't clear from my blog, I highly recommend this order of process; 1) Mill all of the face frame material to the exact same thickness 2) The doors and drawer material needs to be all the same thickness too. I did everything at once and made it all 3/4" thick. 3) build the face frame with a kreg jig and pocket screws with glue 4) build the doors and drawer faces 5) Install a cabinet floor 6) build the cabinet ends and dividers - I mounted a sheet of 1/2" plywood to the aluminum wall so that I could put screws anywhere and not worry about hitting wires, plus it gave me a nice and square top lip for the counter that I squared the end panels and dividers to. 6) Mount the face frame and square everything up. 7) Cut the countertop to length and install. 8) Once mounted, cut the holes in the countertop for sink, stove, etc. 9) Mount the hinges to the face frame and either run a piece of material (wood) to the back so that the hinge is supported or use a hanging bracket that is normally optional with the hinges. 10) Assemble and install drawer boxes flush with the face frame. 11) install drawer faces, recessed hinges and doors 12) I haven't done it yet but looking forward to installing knobs/pulls/handles next.

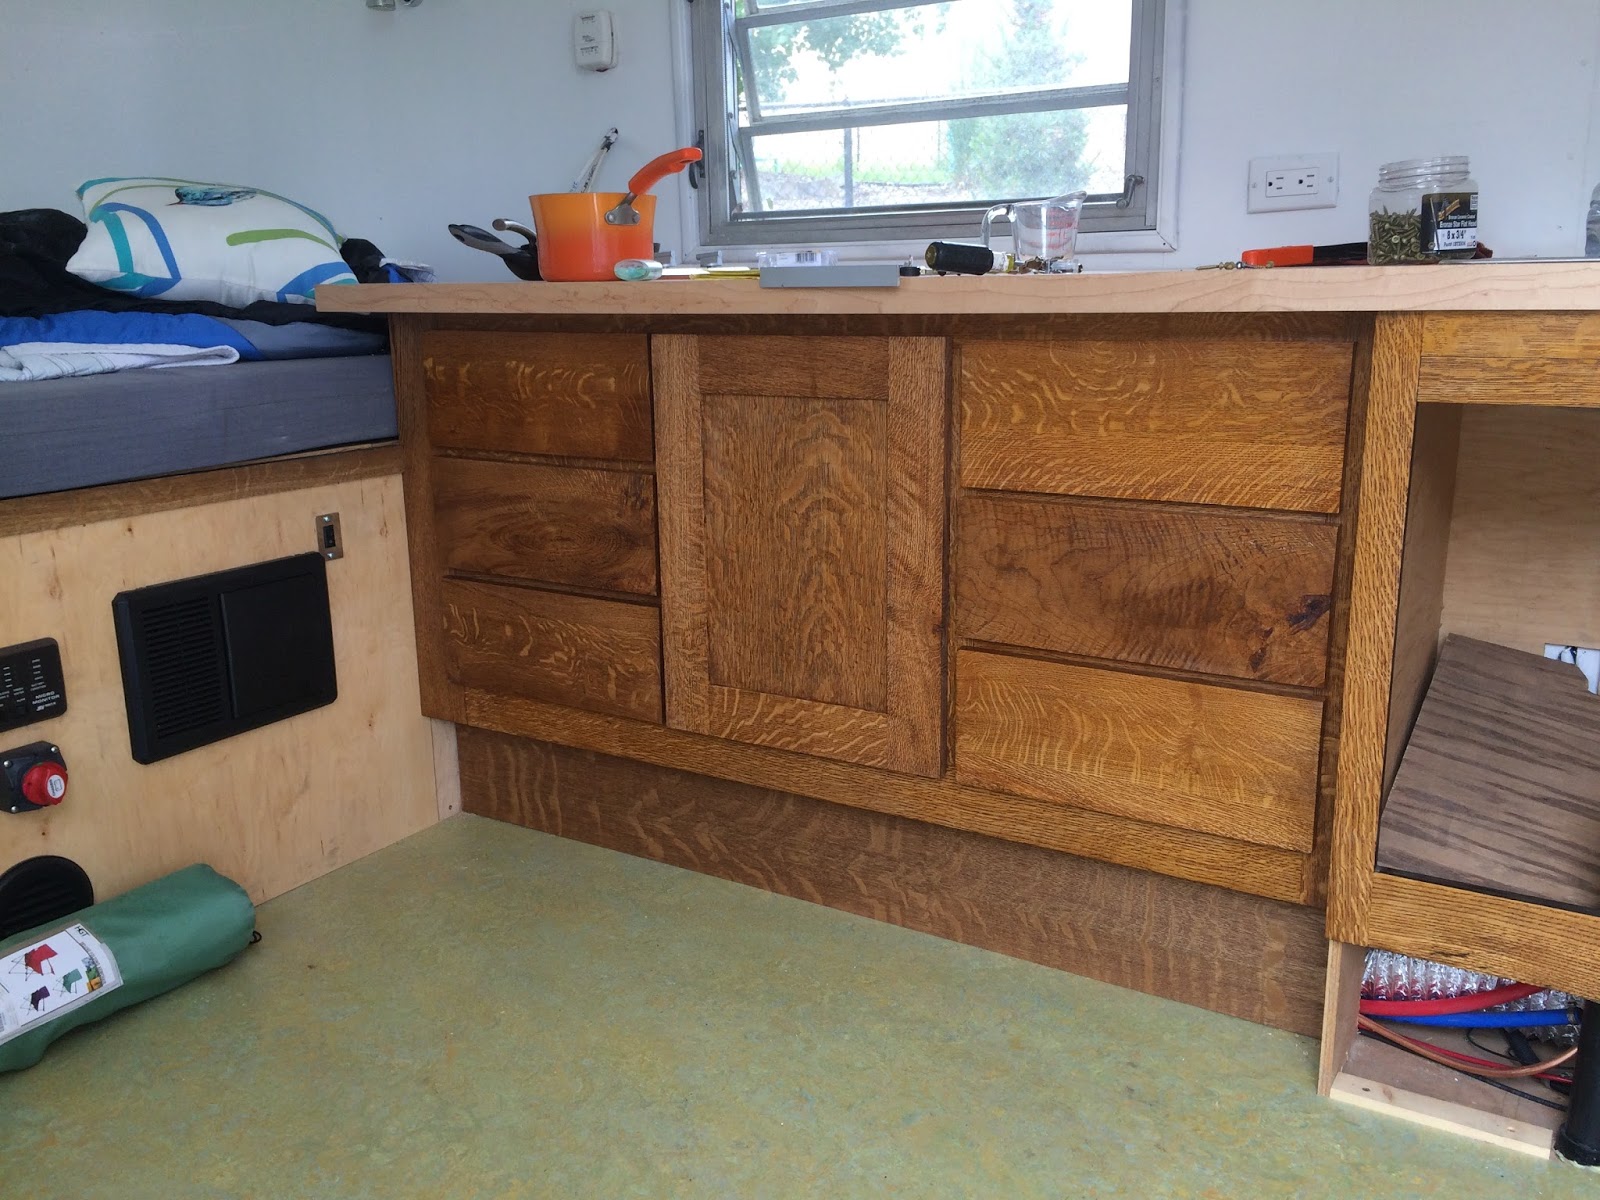 Here you can see the first two drawer faces and the first door going in. so far, so good...
Here's the final product!!! (I'm really happy with how this has turned out so far. Still needs pulls and the new (atwood xt) furnace isn't working, so I'm waiting to install one that does before finishing the under sink cab)