


 I chose to go with recessed, soft close hinges. Honestly might not be the best choice in the long run. The hinge mount is super solid in the door but there is only one screw holding each hinge to the face frame and even those are slotted mounts that can move. After having mounted them, I expect them to fail at some point and am already thinking about what I'll do when they do fail (no good ideas yet)
 Here I am mounting the drawer faces to the boxes. If it isn't clear from my blog, I highly recommend this order of process; 1) Mill all of the face frame material to the exact same thickness 2) The doors and drawer material needs to be all the same thickness too. I did everything at once and made it all 3/4" thick. 3) build the face frame with a kreg jig and pocket screws with glue 4) build the doors and drawer faces 5) Install a cabinet floor 6) build the cabinet ends and dividers - I mounted a sheet of 1/2" plywood to the aluminum wall so that I could put screws anywhere and not worry about hitting wires, plus it gave me a nice and square top lip for the counter that I squared the end panels and dividers to. 6) Mount the face frame and square everything up. 7) Cut the countertop to length and install. 8) Once mounted, cut the holes in the countertop for sink, stove, etc. 9) Mount the hinges to the face frame and either run a piece of material (wood) to the back so that the hinge is supported or use a hanging bracket that is normally optional with the hinges. 10) Assemble and install drawer boxes flush with the face frame. 11) install drawer faces, recessed hinges and doors 12) I haven't done it yet but looking forward to installing knobs/pulls/handles next.

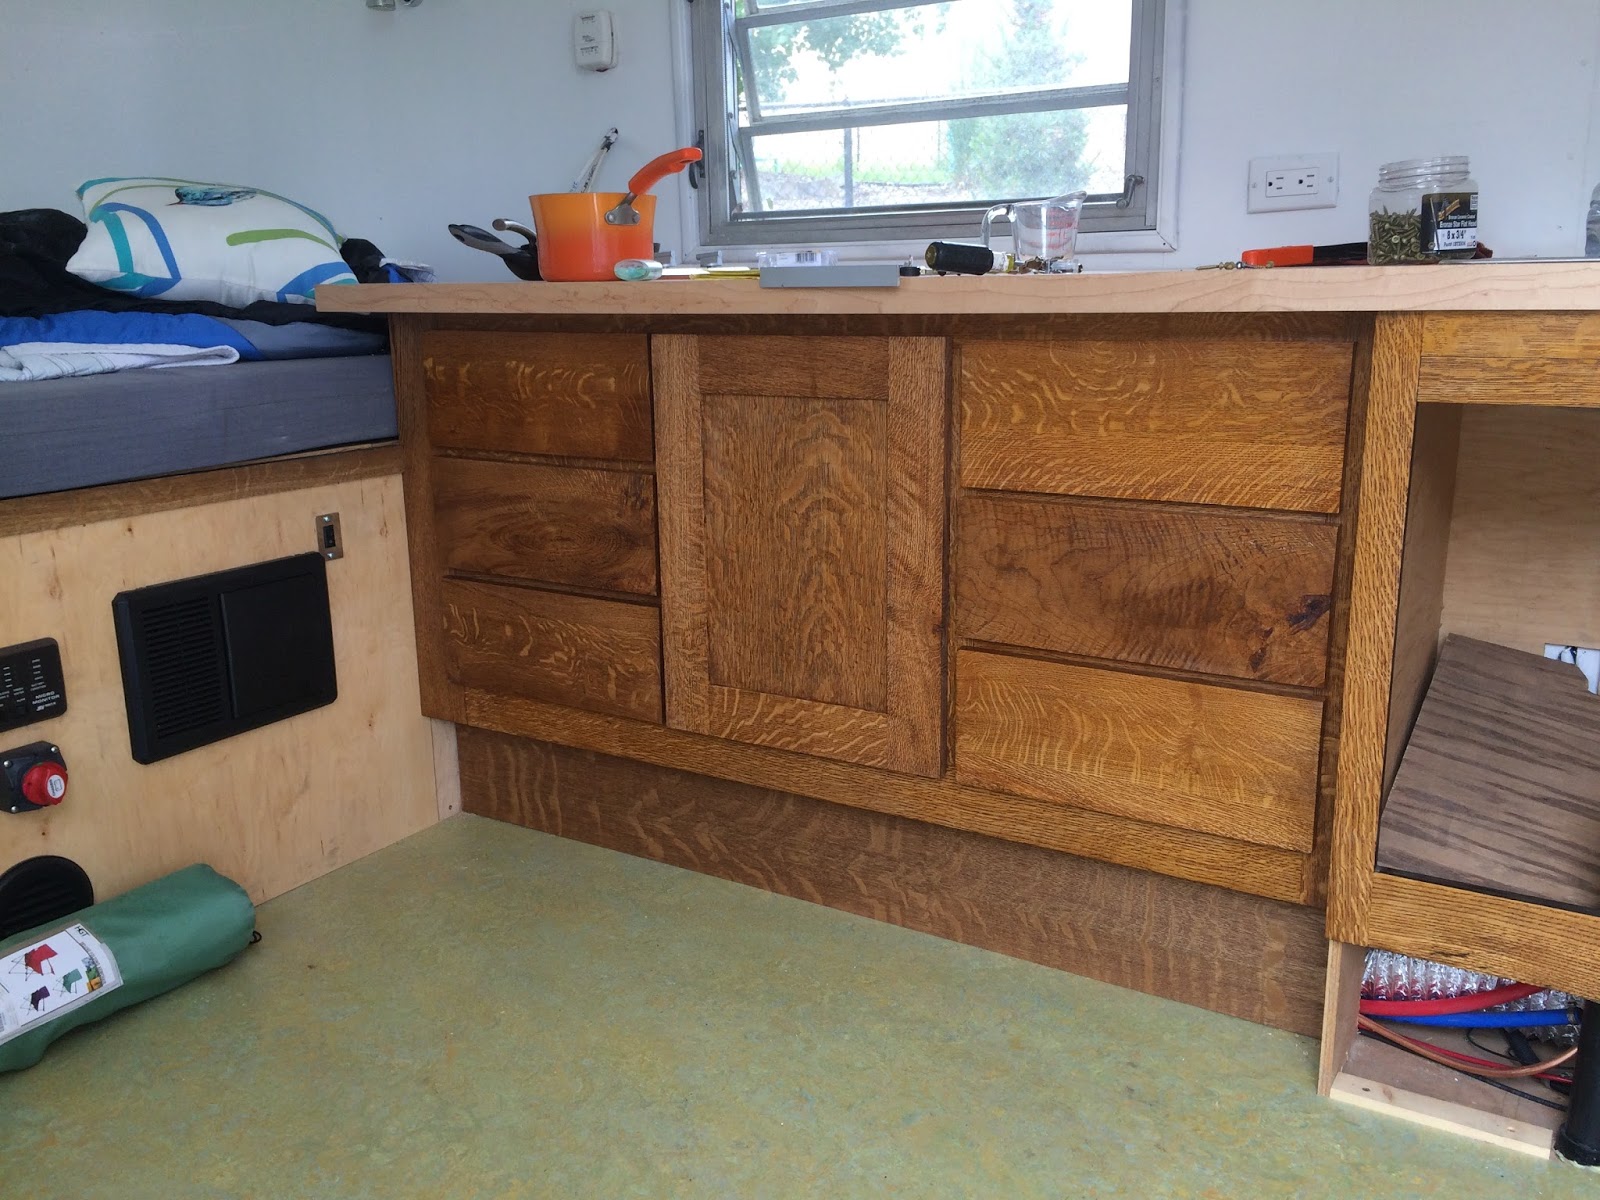 Here you can see the first two drawer faces and the first door going in. so far, so good...
 This is what my cabinet area looked like a few weeks ago.
 Here is a picture of my little helpers. They are applying a vinegar & rust stain that oxidizes the white oak and turns it black/blue/brown.
 This picture shows the wood still wet but in rapid transition.
 I used the cheap Kreg jig pocket screw kit for assembling the face frames. It worked great! Link: https://www.kregtool.com/store/c13/kreg-jigsreg/p169/kreg-jigreg-r3/
 This is some of the raw material that is partially milled. Most of these pieces became doors and drawers. Big thanks to Home Resource in Missoula!!!! Home Resource is a local non-profit that takes building material donations and offers them for sale. In my case, they were good enough to mill my rough material into consistent thickness. They also milled face frame 1x2 material into consistent width. Affordable & quality work.
 This image shows a drawer face being glued. I used the MUD tools and clamps. Turned out great and I barely had to sand the finished product.
 Dry-fitting one of the three doors. Holy crap, this might work!
 Work in progress shot...
 Gluing up a door.
  Here is an image showing the face frame with vinegar & rusted steel. Not sure if you can tell in the picture but the finish is rusting and turning red. I also don't like that it is washing out the cool grain in the quarter sawn oak I'm using...
 Two finish doors. Not as hard as I thought it was going to be. Super pleased with the results.
 Drawer front with awesome grain.
 Finish is even more red now. I don't like it but am committed.
 Applying the vinegar & steel finish to my favorite drawer front. Looks like shit, so I sanded it off this drawer and the two face frames.
  This is the same drawer as above after having sanded off the vinegar solution and added a quality stain.
  In this shot, I'm applying teak oil to a stained drawer front. Finally doing this beautiful wood some justice!
 Stained with dry oil.
 Finishing up the cabinet with several thin layers of shellac.
  Light isn't doing this justice but everything is looking great. I left the black edges on the face frame from the vinegar & it gives a cool effect.
 Face frame is installed and just need the barker drawer boxes to complete. Just ordered them last night and they have a 7 week lead time! Never expected that, guess I'll be working on other parts of the project for awhile...
 Starting on the funnest part! Starting to pick out the finishing touches. This cool sink from Ikea has a built in drain pan and several components like dish drying racks, cutting board and colander. I also like that I can set a hot pan on it if I go with wood or other temperature sensitive countertop material. Currently thinking butcher block maple from lumber liquidators but I might still go with formica or solid surface if I can find product I like better.
 This is a cool Ikea faucet. I like that it's small, has single handle operation and an integrated spray head.
  |
| Reattaching ceiling panel |
 |
| Bed frame |
 This picture shows one of the big problems I had to solve. This corner had a fiberglass shower stall that broke when I removed it. I had no idea how hard it would be to cover this area with aluminum. The white triangle piece is fiberglass cut from the shower and all of the silver strips are a trial and error effort that finally paid off with the help of a fishing buddy.
  Here is the bed with the plywood cover. I used high grade 1/2" maple from Lowes. Its about $42 per sheet. I could probably get away with a lower grade 3/8" product but I'm not taking any shortcuts. I cut the back corners first. Process is to get a piece that is oversized and about the right shape, then I made a scribe (1/2" x 1/2" x 18" square & pointed stick with a hole drilled in it for a pencil to poke through). I drilled several pencil holes in my scribe tool and basically just cut and re-cut until I could match the irregular shape of the walls. For me, being patient and taking my time paid off & every joint is within 1/8" of perfect.
 Back to the outside to add a gravity water fill spout. This barely fit under the gold trim, under the top of the bed on the inside, and still had enough fall to the top of my 60 gallon fresh water tank under the bed. Guess I can't always be unlucky:)
 Here's another first for me. Decided to go with curved radius corners on my booth. You can see in the back that I cut a big half circle out of 3/4" plywood and then cut the circle in half to make two 1/4 circles. Then I put lots of studs for surface area to attach the skin material later. I'm using HD screws for everything.
 Hard to explain how great it was to paint the inside. Not the first coat though. I ordered razzou zolotone textured paint and bought a special sprayer to apply it, and could not have been more disappointed. One application my ass. Anyway, it was a disaster. I tried putting it on thick enough so that it would cover the primer and then it dripped and I had to wipe it off... My recommendation is to pass on zolotone. It did help to soften some texture changes but wasn't worth the $200 - especially since I had to paint two layers of primer and 4 layers of latex over it anyway. Primer and good latex is hard to beat.
 This shot shows paint in the other direction and the 60 gallon fresh water tank. Hope the framing is strong enough to hold the 500lbs of water sloshing around...? I'll come back and make it stronger later.
 Installed these tall panels to go define fridge/convection oven space and also added a back and end to kitchen cabinets.
 Here you can see the table and beginnings of my radius booth. The table has a latch that swings the top down to bed height and also allows it to go outside for use. My buddy has a table like this in his RPod and I love it.