Showing posts with label trailer. Show all posts

Tuesday, June 27, 2017

Turquoise Drawer Pulls

The kids helped me install these awesome turquoise drawer pulls.  You ever take on a project that is big & hard only to surprise the hell out of yourself by exceeding your own expectations?  That's what happened with these cabinets and I couldn't be happier.  

Starting to add the drawer pulls.  Loving the look!!!
I spent time on the layout of pulls and like the way they turned out.  Some people put the door pulls centered in the top corner of the door, I didn't do that and prefer this result.

First, I centered the pulls on the top drawer face.


 Then, I made the door pulls even (level) with it and the lower drawer pulls plumb.  Notice how all of the top row pulls are on the same plane.  


Here, you can see how all of the top pulls line up.

Starting to pull the rest of the living space together also.  This is the front dinette/bed/storage area.  Cushions were custom made by a shop in Missoula.  The center cushion comes out and there is a table that adjusts in height to become a place to eat.  The table is also mobile, so we can use it outside or move it to clean or just move it out of the way for lounging.


 Recessed LED ceiling lights turned out great!  I got these from a marine supply place.


Here, you can see the maxx fan mount and ceiling lights.  Clean, elegant, awesome.  I know lots of people like the fantastic fan but be sure to check out MaxxFan Deluxe.  It has a thermostat, you can leave it open in the rain, the outside cover doesn't rip off in high wind, fan is reversible if you want to suck air in...  Highly recommend these units!


Happy family = project is worth the $ and effort

Although we can use it now, I still have a long 'to do list' to get this where I want it to be.  This is one of my next projects, gotta figure out how to tie all of this together with a nice face frame...

Saturday, July 9, 2016

Finishing up the cabinets!

Building cabinets from scratch is hard but rewarding.  I was gifted the quartersawn oak face frame material by my friend Adam - who passed away recently.  So these cabinets are going to be all the more special....(& I'm trying really hard not to screw them up)

 List of stuff I did for the first time on this cabinet project:  built cabinets of any kind, used pocket screws (kreg jig), used shellac, used a biscuit jointer, used vinegar & steel finish, assembled cabinet drawers, installed recessed hinges, etc, etc.


I ordered the drawer boxes from Barker (link: http://www.barkerdoor.com/Baltic-Plywood-Dovetail-Drawer-Boxes-p/drawerbox-baltic-dovetail.htm )  These were perfect and you can order them in 1/16" increments.   I ordered them unassembled and unfinished.  They went right together with a rubber mallet and bit of glue.  The boxes do need some sanding and then I finished mine with "emmet's good stuff" which was leftover from finishing the raw edges on my butcherblock counter.  Lots of other products would work just as well.
 In case you're wondering about my "shop" - for most of the work, it has been this bench I built in my garage out of 2x4s and plywood.


 You can see that the floor is now in.  It's a sheet marmoleum product.  Abbey flooring in Missoula installed a 3/8" subfloor and the marmoleum for less than $800 total.  Then, I wrapped the curved booth with 1/4" wacky wood from intermountain wood products.  I'll come back later and finish the face with a quartersawn oak veneer to match the cabinets.

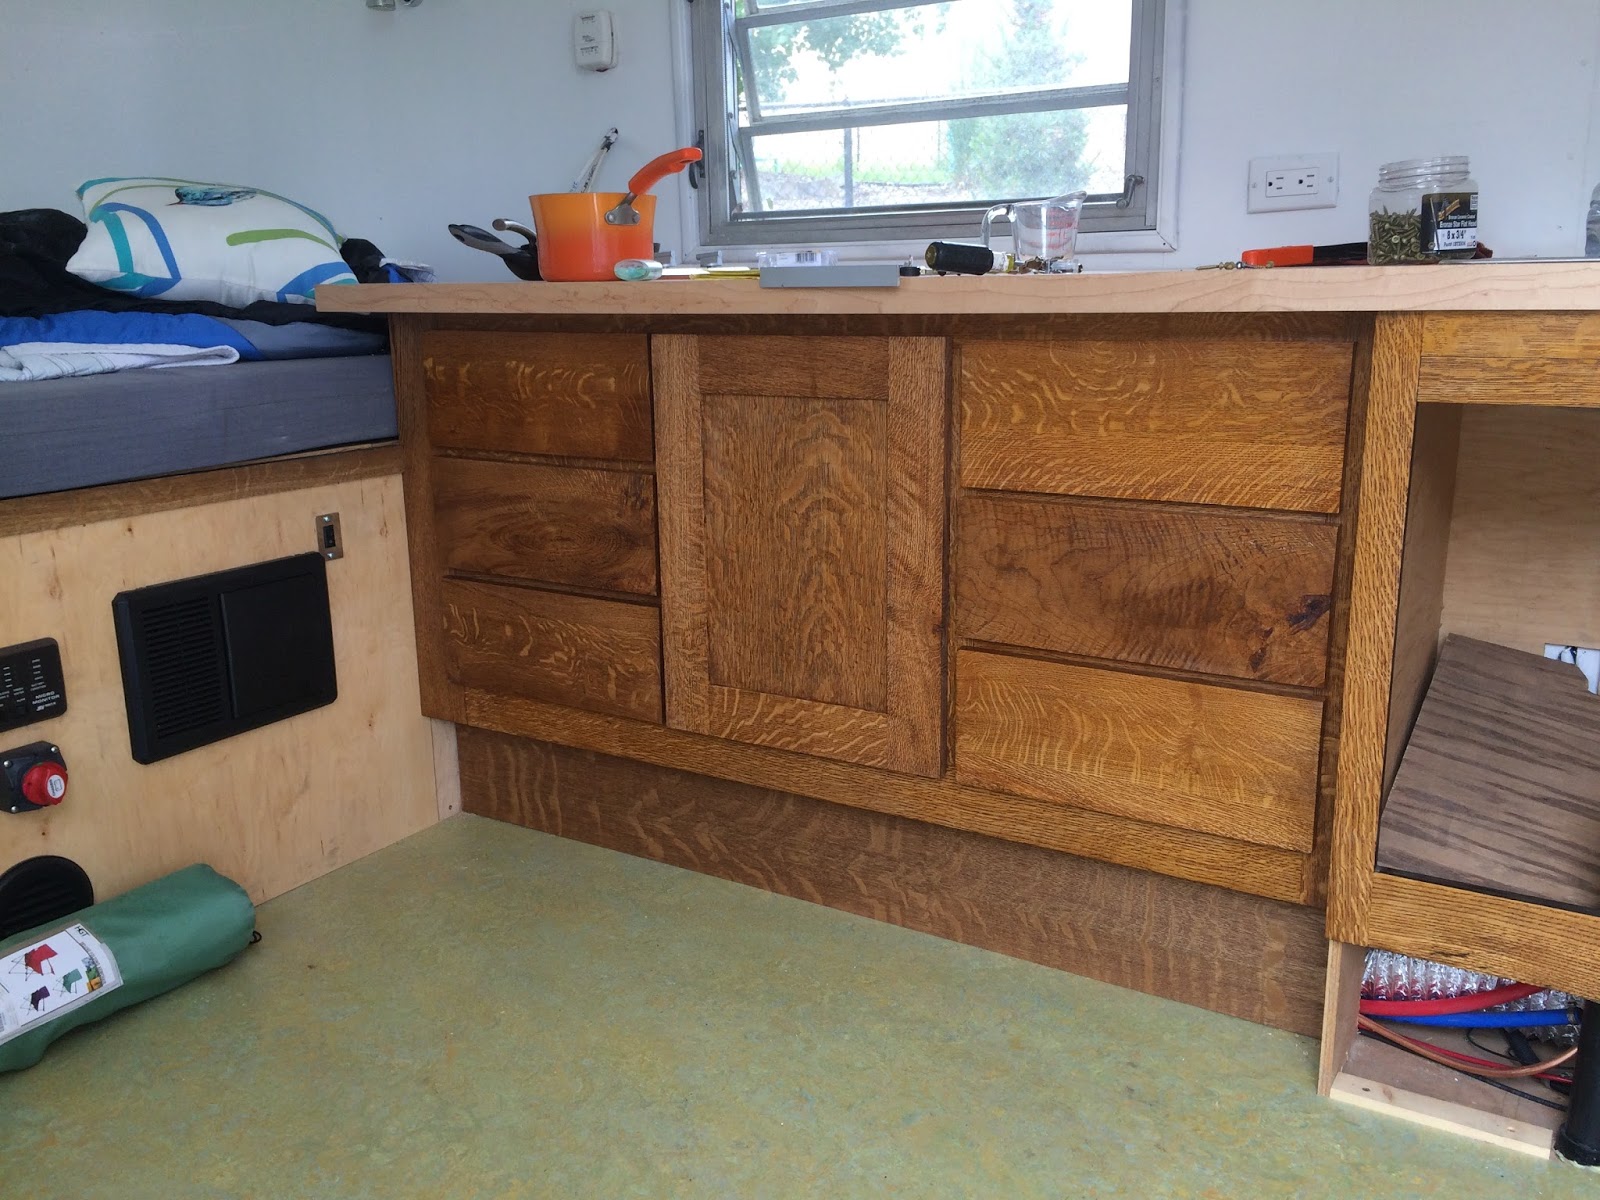
Here you can see the hard rock maple butcher block, 2 burner stove, stainless sink, faucet, faceframe,  and drawer boxes installed.
(Another view)

Looking towards the rear.  You can also see the electrical system tie-in work starting to happen.
I chose to go with recessed, soft close hinges.  Honestly might not be the best choice in the long run.  The hinge mount is super solid in the door but there is only one screw holding each hinge to the face frame and even those are slotted mounts that can move.  After having mounted them, I expect them to fail at some point and am already thinking about what I'll do when they do fail (no good ideas yet)

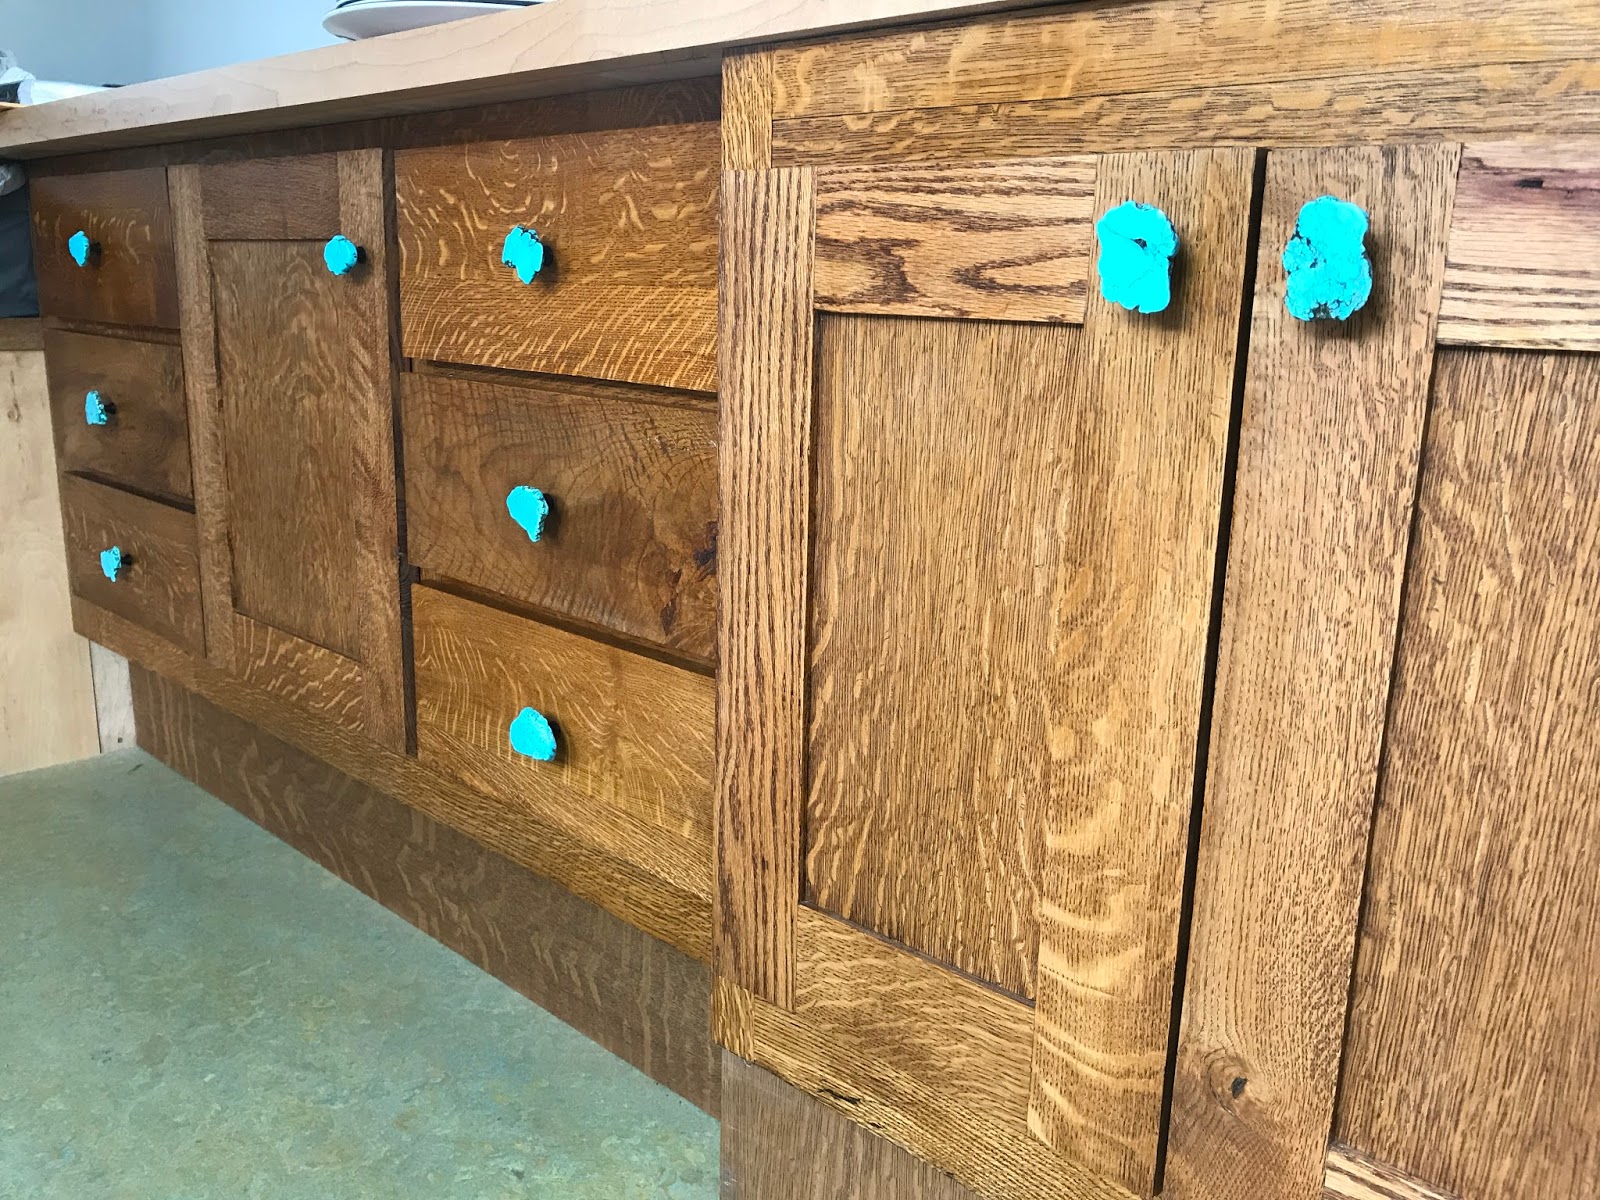
Here I am mounting the drawer faces to the boxes.  If it isn't clear from my blog, I highly recommend this order of process; 1) Mill all of the face frame material to the exact same thickness 2) The doors and drawer material needs to be all the same thickness too.  I did everything at once and made it all 3/4" thick.  3) build the face frame with a kreg jig and pocket screws with glue  4) build the doors and drawer faces  5) Install a cabinet floor  6) build the cabinet ends and dividers - I mounted a sheet of 1/2" plywood to the aluminum wall so that I could put screws anywhere and not worry about hitting wires, plus it gave me a nice and square top lip for the counter that I squared the end panels and dividers to.  6) Mount the face frame and square everything up.  7) Cut the countertop to length and install.  8) Once mounted, cut the holes in the countertop for sink, stove, etc.  9) Mount the hinges to the face frame and either run a piece of material (wood) to the back so that the hinge is supported  or use a hanging bracket that is normally optional with the hinges.  10) Assemble and install drawer boxes flush with the face frame.  11) install drawer faces, recessed hinges and doors  12) I haven't done it yet but looking forward to installing knobs/pulls/handles next.

 Here you can see the first two drawer faces and the first door going in.  so far, so good...


Here's the final product!!!  (I'm really happy with how this has turned out so far.  Still needs pulls and the new (atwood xt) furnace isn't working, so I'm waiting to install one that does before finishing the under sink cab)


Wednesday, June 1, 2016

Veneer backing in curves?

Anyone have a good recommendation for a thin backing material for the base of my booth/dinette/couch/sleeper?  I'm putting a "U" shaped booth in the front of my 67 Streamline Duchess.  I've framed in some three curved radius along the base.  My plan was to use 1/8" door skin material and then use a real quarter sawn oak veneer.  The doorskin can handle the radius (~ 6") and I'm looking for alternatives that will be a good backing for my thin veneer material.  Recommendations?  Ideas?

Here you can see the basic shape outlined in masking tape. 


 This is a drawing with measurements of what I've framed.  Pics of framing below.
This shows the beginning of the frame and the black metal table legs.  This is a cool design that swings down to sleeper height.  It also is mobile and can go outside.


Here you can see the finished frame with 3 radius corners.  Still trying to figure out the best way to support the table top.  I've thought 1x2" oak in the straight aways but then am not sure what to do in the curves.  Ideas?
Working on where to put the seams in the plywood & cushions.  I want them to line up so its easier to access under seat storage.  Thinking I'll permanently mount seat plywood in the corners and then leave the three other sections as access. 

 In this section, I'm thinking one big piece of plywood/cushion.  Not planning to put in a hinge, just a small lip to keep plywood in place and then velcro the cushion.  

One last overall look at this phase.


Friday, June 5, 2015

Construction

The phase of new construction is now underway.  I was going to leave the interior end caps in place but there was still a mouse smell - so I pulled the endcaps, cleaned them, and sprayed them with Kilz primer.  Then, I used an enzyme cleaner and doused all of the skin inside the walls.  Smell is all gone now and I've started installing Reflectix insulation.

This was one of the last bits of insulation.  You can see pest damage & tunnels.

Reflectix insulation going in.


Wiring from under the chassis.  Brown wires are for the brakes.  120v black (with plugs) and red wires are for the 2-way holding tank heaters.

Thursday, May 21, 2015

Insulating the floor and belly pan install

It's been tricky to attach the shell over the bellypan but I got it all figured out and sent rivets through the top shell, belly pan, 'C' channel, and belly pan.  The belly pan aluminum is crimped over the channel, so the rivets go through it twice.  

  Here's where old meets new.  I used the old pan in the corners - because I didn't think I could figure out how to shape the aluminum and they are still in fair condition.

New pan on the street side.  Looks great.


This is "foam it green" brand sprayfoam.  It's the 202 kit of structural, closed cell product.  I put it on thick, so it only covered about 80 sqft.  Price with shipping was about $250, so that's more than $3/sqft.  Not as expensive as some options but certainly more than others.  Overall, I'd say that I'm moderately pleased.  It is fairly rigid and has decent adhesion but wasn't very difficult to remove in areas of overspray.


One of the biggest complaints I've heard is that the product makes a mess.  So here's a picture of the mess.  Not too bad in my opinion.

Buttoning up the belly pan over the sprayfoam insulation.  I had to carve off a few bits.  For carving, I used a dewalt saws-all blade as a knife & it worked great.

Wednesday, May 13, 2015

Finished Wastewater System


Wastewater system is done!!!  Both holding tanks are in and glued.

I had to alter the frame but was able to put two holding tanks between the floor and belly pan.  These tanks are from Inca Plastics and are 23 gallons each.  Tanks were just a bit warped and didn't fit within the dimensions on the blueprint, so I had to cut some of the iron and re attach.

 Here you can see the cable valterra valves.  I welded a piece of angle iron to mount the handles and will figure out how to make that look pretty later.

Things are starting to look good!  The new wheel wells are beautiful.  Lafe Shoopman of L&C Custom did a great job on the wheel wells and only charged me $300 for both.  I lifted the trailer 3.25" with the new InlandRV (dexter) torsion axles and so I took three inches out of the wheel wells.  This should give me precious extra cabinet space.  My only complaint is that InlandRV did not respond to three requests asking them how much travel I should allow for with the new axle setup.  Annoying.  I couldn't wait forever so I just cut off what I added in height.  If that doesn't work, I'm going to be super pissed at InlandRV.

Put the trailer back under the shell!  Oh hells yeah.  Feels great, can't imagine how good it'll be to get it reconnected - much less useable!
So far, it's looking pretty good.  The rear end was completely rotten, so I didn't have much in the way of templates.  My plan is to lower the shell down onto the chassis and make the final adjustments to the wood and attach the bellypan, etc all at once.  I think I'll be able to do any needed modifications but we'll see:)  I also plan to use structural sprayfoam under the wood floor as I put the belly pan on.  Lots of stuff in the airforums about how sprayfoam falls apart but I can't find a credible account of closed cell foam failing - so I'll give it a try.  Properties are too good to pass up.  Fiberglass batt is popular but it's also the reason I had to do a frame off in the first place!